
Shoulder Holder Yoga Mat Strap Pattern!

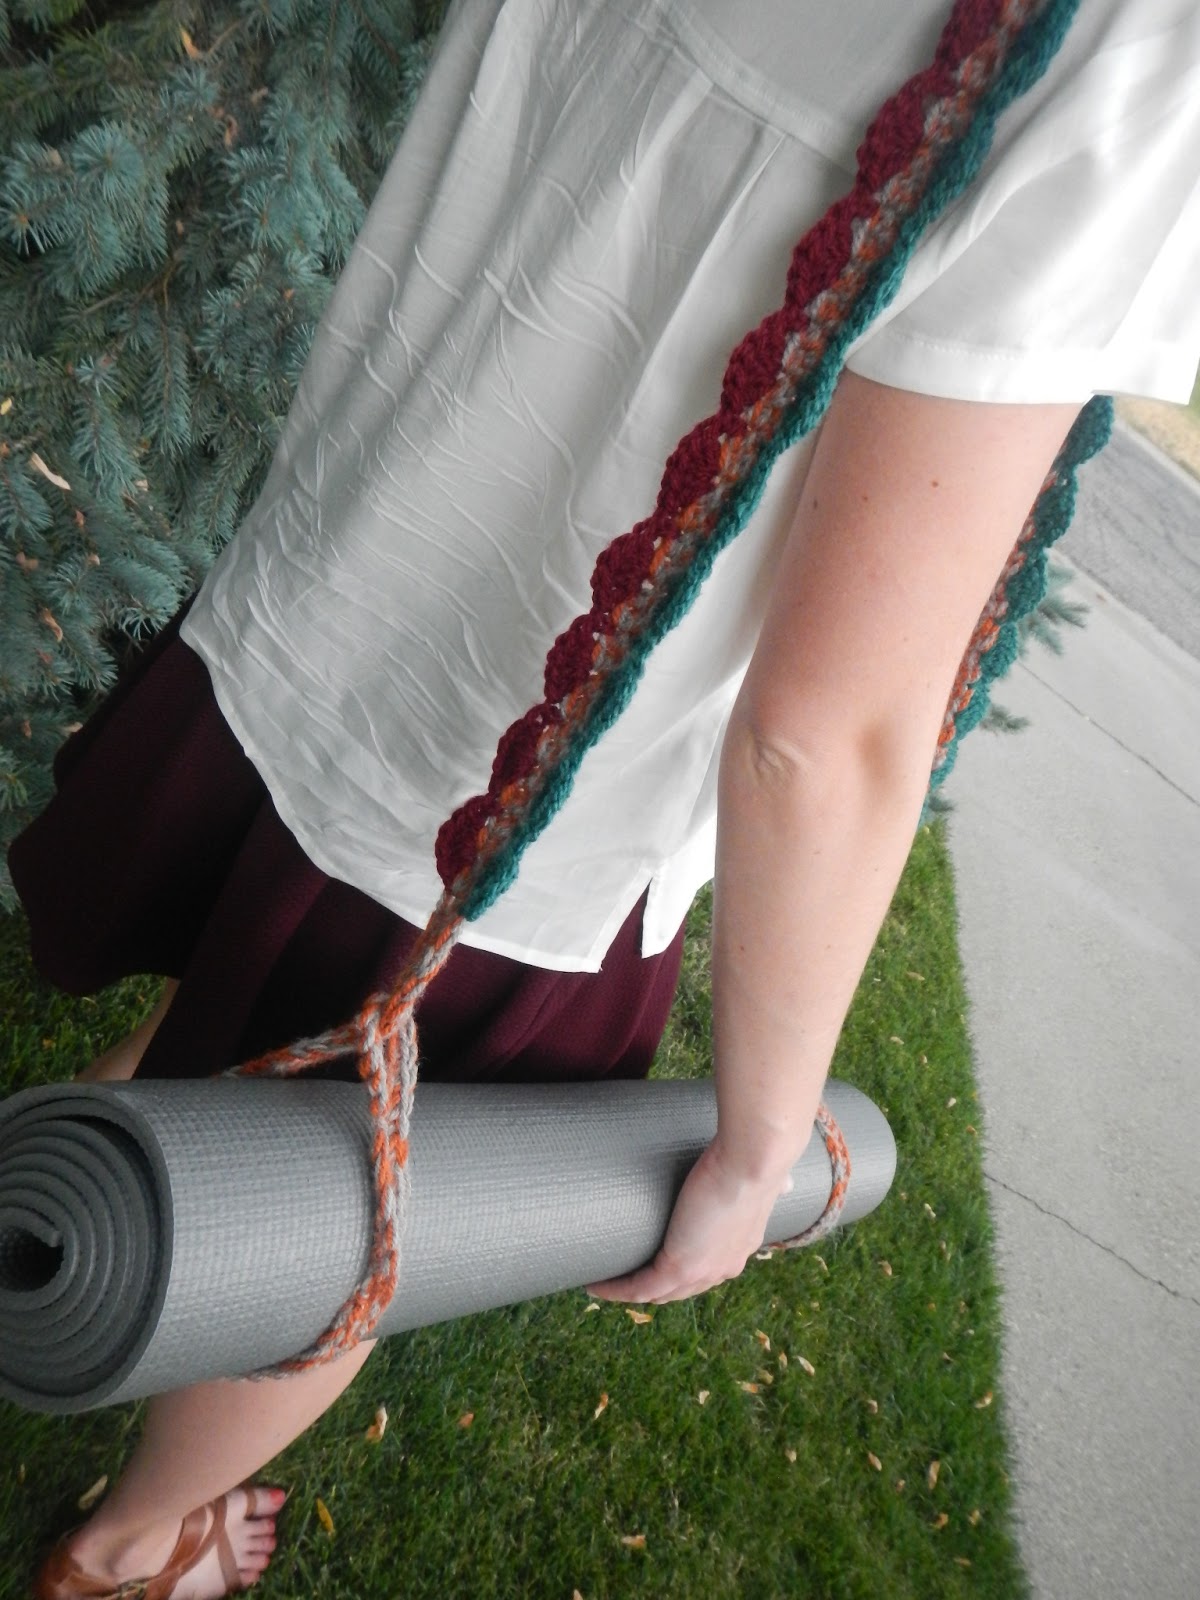
This is Little Bug #6, modeling the yoga strap. :-)
From yesterday's post:
 Do you ever crochet something, in a pinch, that you need NOW and then realize it was so cool
that you should have taken the time to photograph the process in order to share the pattern?
This is Little Bug #6, modeling the yoga strap. :-)
From yesterday's post:
that you should have taken the time to photograph the process in order to share the pattern?
Well that happened here...
but at least it gave me the opportunity to make another one for the tutorial
and make it sturdier than the first. :-)
Now I have an extra. haha.
and make it sturdier than the first. :-)
Now I have an extra. haha.
Who knows it may end up as a gift or a give-away one day.
OVER THE SHOULDER YOGA MAT HOLDER
CROCHET PATTERN
(US terms)


sl st to first ch to form a loop

 9 chs back from end sl st into 9th ch.
So you will have one long ch strip with two loops on each end.


 *Once you get to the loop, then alternate working 1 sc,
then 2 sc in each st around the loop.
(This will help keep the loop from curling.)


 and this.
 Weave in those ends.


 sk 1 and 5 dc in the next st.
(Sorry photo shows sl st next to loop - which I accidentally photographed first -
ignore this and pretend this photo is 14" away from the end of the loop.
Oh man, it's a good thing this is a free pattern...gee whiz. ;-) )
 like this.
 ** *Now sk 1 st and sc in the next st,
 sk 1 st and 5 dc in the next st.*
This will start forming the "shells".
 Continue from * to *
 until you are 14 " away from the other end.
 This photograph is correct.
 This one too. ;-)


 Weave in those ends and you should have something that looks like this.
 Now here's the tricky part:
Pull one loop through the other...all the way to where the other shell part ends.
(You'll be pressing some pretty thick stuff through the loop, but it will be OK.

like this.

It will look like this.
Now take this end that you looped and pull through the other loop on the other end.
(This will be even thicker stuff, but once again it will be OK.)


Attach to mat and you are ready to hit
the gym or ready to gift this to someone who will hit the gym.


(US terms)
Gather supplies
An "I" hook (5.5 mm)
Scissors and needle.
Yarn:
Scraps are great for this!
Maroon yarn was used, as well.
These are all Encore classic - worsted wool blend.
.
I always make sure that if this is for Little Bug #6 or FDIL #3a
that the colors chosen are colors that I basically do not like and then I put them in a
"crazy-nonsensical" combination. (IMHO)
This ensures that I will not like the finished color scheme, but they will.
Hah!
I've given up on trying to figure out these young ladies. ;-)
UPDATE:
I have been finding that a worsted cotton works really well.
Also, experiment with less than 210 beginning chs
(all other instructions will be applicable)
for a shorter strap.
Here we go:
With TWO strands of worsted yarn,
(You will be using two strands throughout except
for shell edges, then you will use one strand.)
ch 8
sl st to first ch to form a loop
ch 210
So you will have one long ch strip with two loops on each end.
sc in the next ch and each ch all the way
to the beginning of the loop at other end.
then 2 sc in each st around the loop.
(This will help keep the loop from curling.)
Once you arrive at the other side of the loop,
continue working a sc in each st back to the other end.
You will be working the stitches into the other side of the original chs.
Once you arrive at the other loop, crochet around it alternating 1 sc and 2 sc in each stitch.
(same as * above.)
Then it should look like this.
Measure from the end of the loop down the number of inches you need to
fit around the circumference of the rolled yoga mat.
All yoga mats are difference thicknesses - I came up with 15" for this one,
but once it stretched I realized it could have been 14".
14" would be pretty good for most standard mats.
Now with a SINGLE STRAND of an equally lovely coordinating color ;-)
sl st the new color 14 " from the end of one of the loops.
You can ch 1 here if would like...or not.
It doesn't look like I did.
(Sorry photo shows sl st next to loop - which I accidentally photographed first -
ignore this and pretend this photo is 14" away from the end of the loop.
Oh man, it's a good thing this is a free pattern...gee whiz. ;-) )
This will start forming the "shells".
Now with a color of your choice sl st directly across
from where the last shell row ended.
Repeat the same pattern of shells from **above.
The shells should line up like this.
Pull one loop through the other...all the way to where the other shell part ends.
(You'll be pressing some pretty thick stuff through the loop, but it will be OK.
like this.
It will look like this.
Now take this end that you looped and pull through the other loop on the other end.
(This will be even thicker stuff, but once again it will be OK.)
Attach to mat and you are ready to hit
NAMASTE!!!
Wow ... That is great Astri! And thank you so much for the awesome tutorial!
ReplyDeleteIt's very nice Astri. Thanks for the tutorial. :)
ReplyDeleteReally cute Liz and nice tutorial. I'm pinning it!
ReplyDeletePerfect idea.
ReplyDeleteHugs,
Meredith
I love how you had to make a second one for the tutorial! xx
ReplyDeleteChez Astri le crochet sert à TOUT faire !!!!!!!!!!!!!!!!!!!!
ReplyDeleteI know this is an old post, but I'm hoping you'll see this comment. I was wondering if this pattern was okay to use to make and sell these straps. I am looking to raise money to donate to a sober yoga recovery group. Please let me know. Thank you.
ReplyDeleteYes by all means, of course!
DeleteWonderful! Thank you so much!
DeleteThis comment has been removed by a blog administrator.
ReplyDeleteThis comment has been removed by a blog administrator.
ReplyDeleteThis comment has been removed by a blog administrator.
ReplyDeleteJust picked up a yoga mat in a charity shop and looking forward to making a strap for it . Thanks.
ReplyDeleteJust picked up a yoga mat in a charity shop and looking forward to making a strap for it. Thanks. I like the idea of random colours.
ReplyDeleteYay! Thank you for trying it out!
Delete